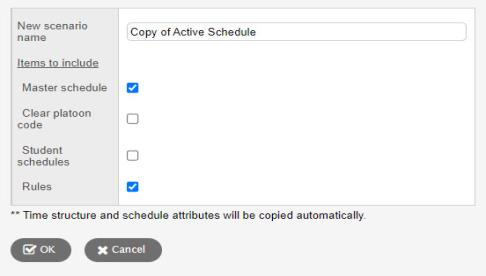
You can create a new scenario using the current scenario.
|
Note: If you copy a scenario from a different schedule build year, the system does not copy the term dates from that year. |
- Log on to the Build view.
- Click the Scenario tab.
- Select the scenario you want to copy, and click the Details side-tab.
- On the Options menu, click Copy Scenario. The Copy Scenario pop-up appears.
-

- Type a name for the new scenario.
- Select the checkboxes of the items you want to copy from the original scenario to the new scenario. For example, you might want to copy the schedule you built with the original scenario, but not the rules because you want to try to build a schedule with fewer restrictions.
|
Note: Only checkboxes for items that apply to your scenario appear. For example, if your original scenario does not use a bell schedule, the Bell schedule checkbox does not appear. |
- If the original scenario does not share schedule attributes, an Advanced button appears on the Copy Scenario pop-up. Click Advanced and the schedule attribute options appear.
- Select the checkboxes if you want to copy the following information defined for the original scenario.
- Master schedule
- Student schedules
- Rules
- Bell schedule
- Rotations
- Course build attributes (course scheduling parameters)
- Student build attributes (student scheduling parameters)
- Staff build attributes (staff scheduling parameters)
- Time structure (terms, days, periods)
|
Note: If you do not select to copy a build attribute, the system uses the shared attribute you defined for the original scenario. Therefore, for most scenarios, you do not select these checkboxes. |
- Click OK.
Now, you can edit any of the information you copied from the original scenario.
